
Introduction to Google Tag Manager Salesforce Commerce Cloud
Google Tag Manager (GTM) is a tool that captures and records all user interactions on your storefront and stores them as a data object. Marketers and analysts can then use this data object to gain insights into customer behaviour and develop strategies to retain potential customers.
In the context of Google Tag Manager Salesforce Commerce Cloud, GTM acts as a centralised tag management solution that enables businesses to implement and manage tracking without repeatedly modifying the codebase. It uses a data layer implementation in SFCC to capture user interactions such as clicks, page views, and transactions in a structured format. This makes it easier to track user events in Salesforce Commerce Cloud and power tools like Google Analytics, Facebook Pixel, and Google Ads.
Bringing a product to market is rarely a flawless endeavour, as the initial version is often far from perfect. In order to even have a chance of getting the product into the hands of potential customers, a GTM implementation in Salesforce Commerce Cloud is crucial.
How to Implement Google Tag Manager in SFCC
To successfully implement GTM integration with SFCC, the process typically involves:
- Creating a GTM account and generating a GTM ID
- Adding the GTM cartridge SFCC (plugin_gtm) to the cartridge path
- Integrating the plugin into your codebase
- Completing GTM configuration in Salesforce Business Manager
- Setting up the data layer for custom event tracking SFCC
- Testing using tools for GTM debugging Salesforce Commerce Cloud
- This forms the foundation of a complete Salesforce Commerce Cloud GTM setup guide and enables accurate Salesforce Commerce Cloud tracking and conversion tracking in SFCC.
What is Google Tag Manager in Salesforce Commerce Cloud?
Google Tag Manager in Salesforce Commerce Cloud (SFCC) is a tag management solution that allows businesses to implement and manage tracking codes (tags) without directly modifying the storefront codebase repeatedly.
It works by using a data layer implementation in SFCC, where user interactions such as clicks, page views, and transactions are stored in a structured format. This data is then used by tools like Google Analytics, Facebook Pixel, and Google Ads.
With GTM, businesses can:
- Track user behaviour across the entire storefront
- Enable Salesforce Commerce Cloud tracking without a heavy development effort
- Improve conversion tracking in SFCC
- Support ecommerce tracking in Salesforce Commerce Cloud
- Centralise all marketing and analytics tags in one place
Why Google Tag Manager is Important for Salesforce Commerce Cloud Tracking
A standard analytics setup only captures what happened. GTM helps you understand how and why it happened.
With GTM integration SFCC, you can:
- Gain deeper insights into user journeys
- Enable custom event tracking SFCC
- Improve campaign performance and ROI
- Build data-driven marketing strategies
- Enhance user experience through behavioural insights
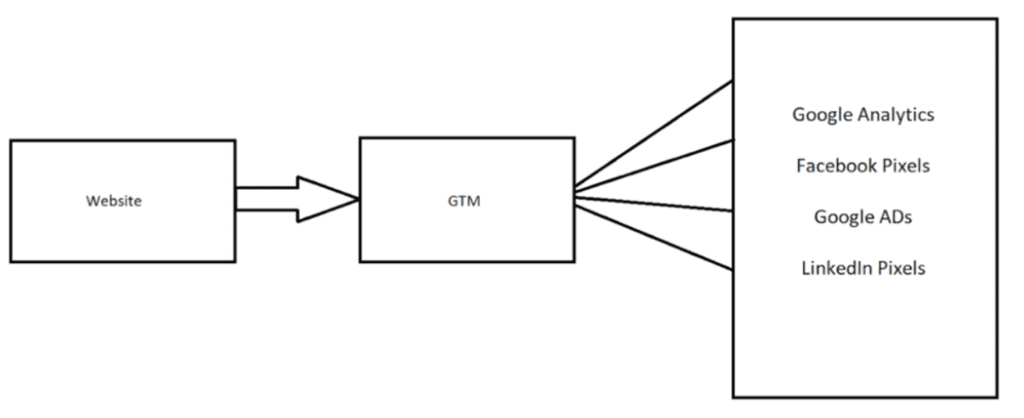
Role of Google Tag Manager in Salesforce Commerce Cloud Tracking
Google Analytics (SFCC Google Analytics Integration)
It can be integrated with GTM to get more detailed insights about a website’s visitor activity, reach, cost-per-click (CPC), and customer interactions, among other metrics.
Facebook Pixel (Conversion Tracking SFCC)
On the other hand, it collects data from websites or advertisements associated with Facebook posts using GTM. This tool helps to analyse user behaviour and track conversions from Facebook ads.
Google Ads (Ecommerce Tracking Salesforce Commerce Cloud)
Finally, Google Ads, using GTM, utilises customer data to create personalised ads that target specific audiences based on their online behaviour, interests, and demographics. This allows for a more targeted and efficient advertising approach.
Prerequisites for GTM Integration in SFCC Sandbox
To enable the triggering of tools, we require the addition of a code snippet, specifically the GTM ID, to our website. This integration of GTM is essential for enabling Salesforce Commerce Cloud tracking and needs to be done by a developer.
To start using GTM in your Business Manager and code base, follow the steps below:
Requirement:
- GTM ID
- Cartridge path update
Steps to Setup Google Tag Manager Container
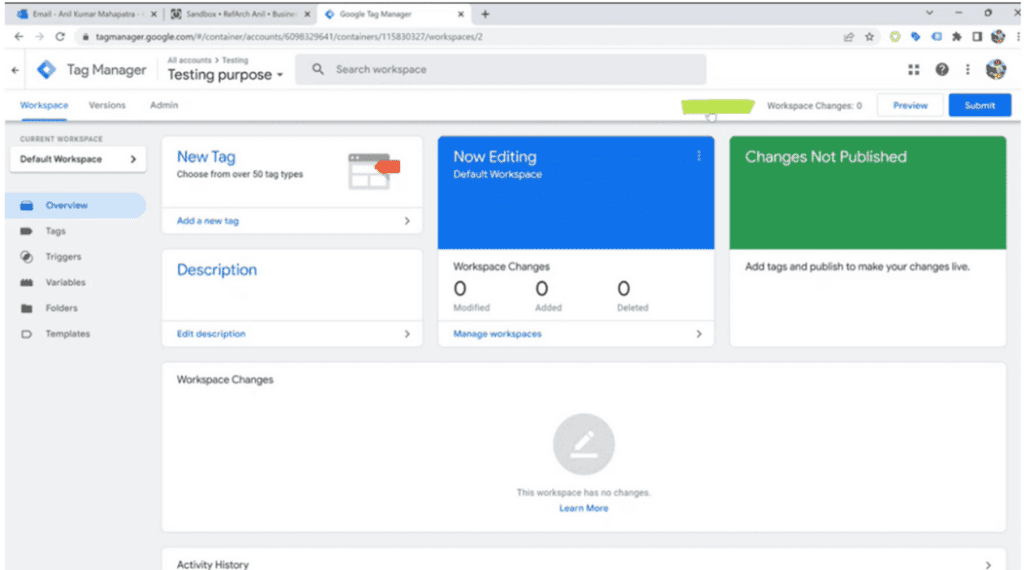
Step 1: Create GTM Account
Create an account at tagmanager.google.com and copy the ID given after creating the new account.
The ID is highlighted in green in the below image:
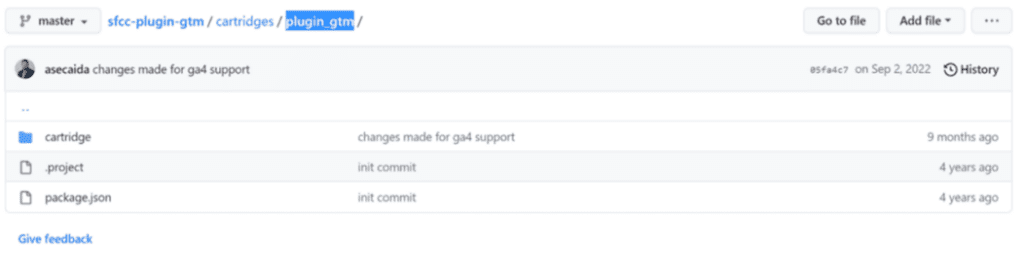
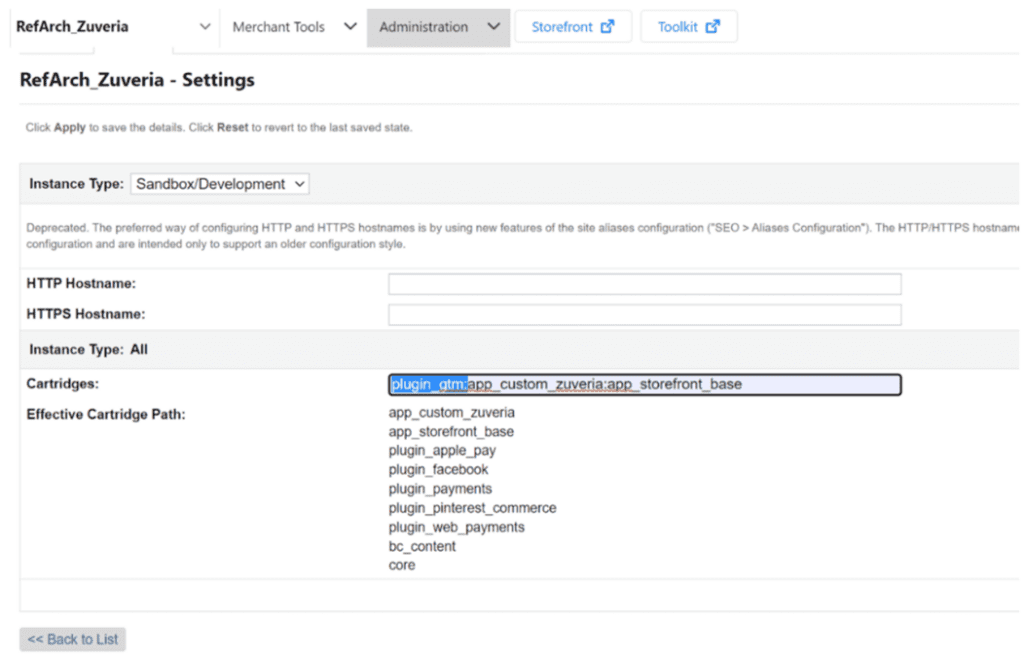
Step 2: Add plugin_gtm Cartridge (GTM Cartridge SFCC)
Next, to add the plugin_gtm cartridge to your cartridge path, go to the plugin_gtm repository on GitHub:
https://github.com/redvanworkshop/sfcc-plugin-gtm
To do that, we can either create our own cartridge in the base code or use the existing ones available in GitHub repositories.
After that, go to cartridges/plugin_gtm, copy the folder name, and configure it in your sandbox’s cartridge path under:
Administration > Sites > Manage Sites > Select Site > Settings
Make sure you configure this cartridge before your base cartridge.
GTM Plugin Integration in the Code Base
Step 1: Clone Repository
After updating your cartridge path, add it to your code base.
Use your IDE (e.g., VS Code) and clone the repository:
git clone https://github.com/redvanworkshop/sfcc-plugin-gtm.git
Alternatively, download the ZIP file and extract it locally.

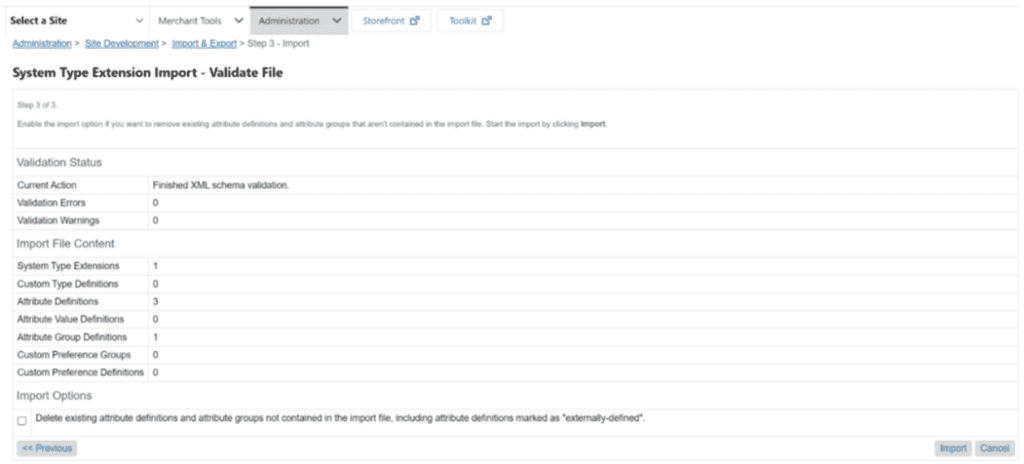
Step 2: Import Metadata (GTM Configuration in Salesforce Business Manager)
Import the metadata file gtm_metadata.xml:
- Go to Administration > Site Development > Import & Export
- Upload the file
- Select and import
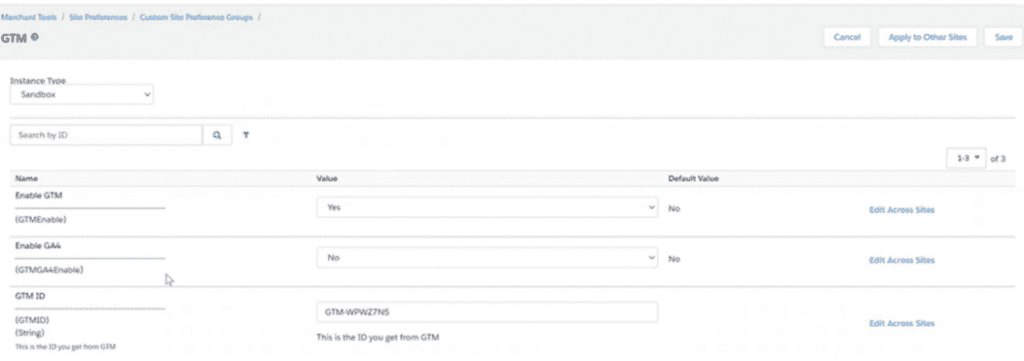
Step 3: Configure GTM in Business Manager
Enable GTM and add the GTM ID:
Merchant Tools > Site Preferences > Custom Preferences > GTM
Note: The GTM ID must match your Tag Manager account ID.
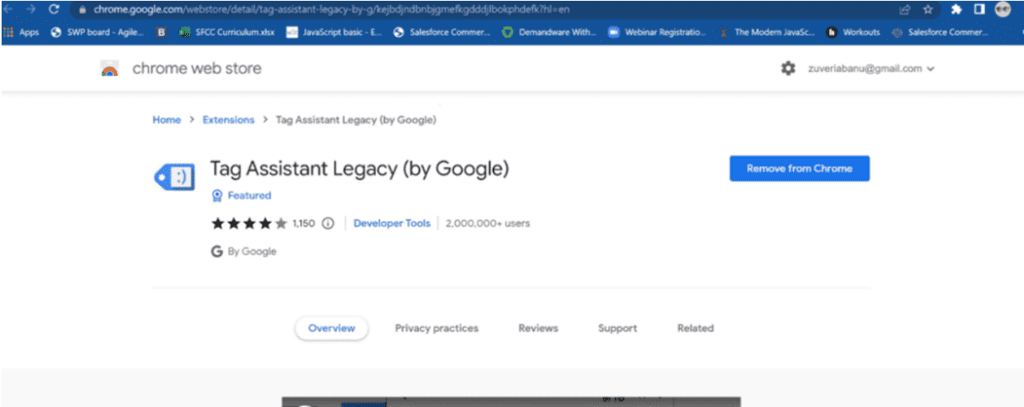
Step 4: Test GTM Implementation (GTM Debugging Salesforce Commerce Cloud)
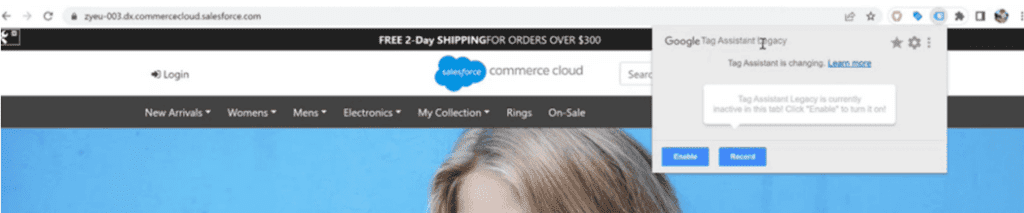
Use Google Tag Assistant Legacy (Chrome Extension)
Add the extension, go to your storefront, enable it, and reload your page.
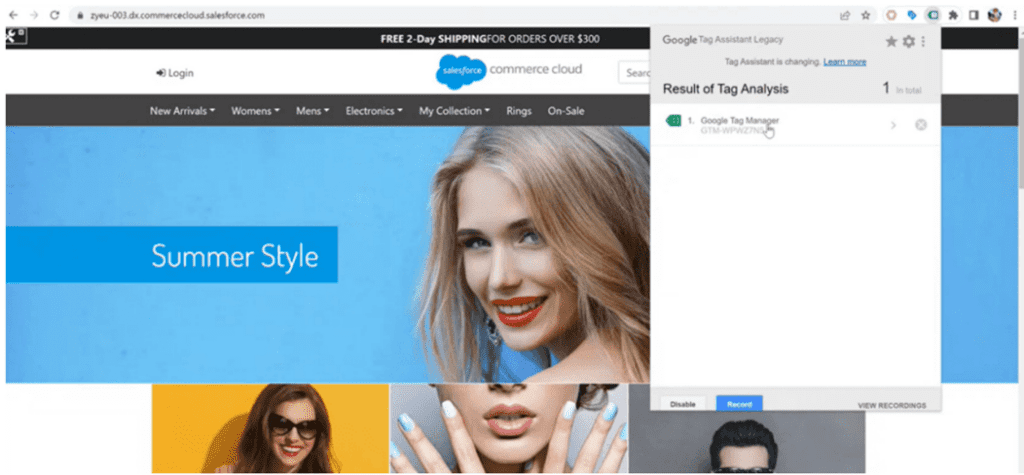
Here, you can see the GTM Tag Manager under the extension with your GTM ID. Click on your ID and go to the Data Layer to see the analysis.
Understanding Data Layer Implementation in SFCC
The analysis in the data layer can be seen like this:
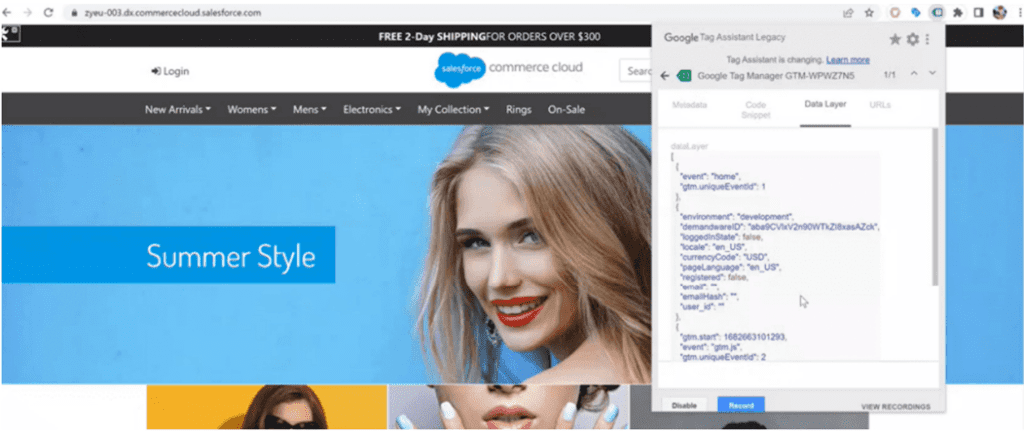
In the above image, the “event” is “Home” because you navigated to the homepage.
If you visit PLP, PDP, or Quickview, the value of the “event” key will change accordingly. This helps track user events in Salesforce Commerce Cloud effectively.
How to Implement Google Tag Manager in SFCC
To implement Google Tag Manager in Salesforce Commerce Cloud (SFCC), follow these key steps:
- Create a GTM account and obtain your GTM ID
- Add the plugin_gtm cartridge to your SFCC cartridge path
- Integrate the plugin into your codebase
- Import GTM metadata into Business Manager
- Configure GTM ID under Custom Preferences
- Test using Tag Assistant for GTM debugging Salesforce Commerce Cloud
- Validate data layer events for accurate tracking
This forms a complete Salesforce Commerce Cloud GTM setup guide.
How to Do Personal Customizations on GTM as per Client Requirements
Now that you know how to set up GTM in both the sandbox and the code base, let’s look at custom event tracking SFCC.
Requirement:
Send data to GTM for a Quickview event
Files Altered:
- tagmanager.js
We can gather data from controllers, models, ISML, and client-side JS files and push it into the dataLayer object.
Points to Remember
- Write JSON under the specific event object
- Example: search bar data → searchshow object
- Data must always be in JSON format
Step 1: Tagmanager.js (Custom Event Tracking SFCC)
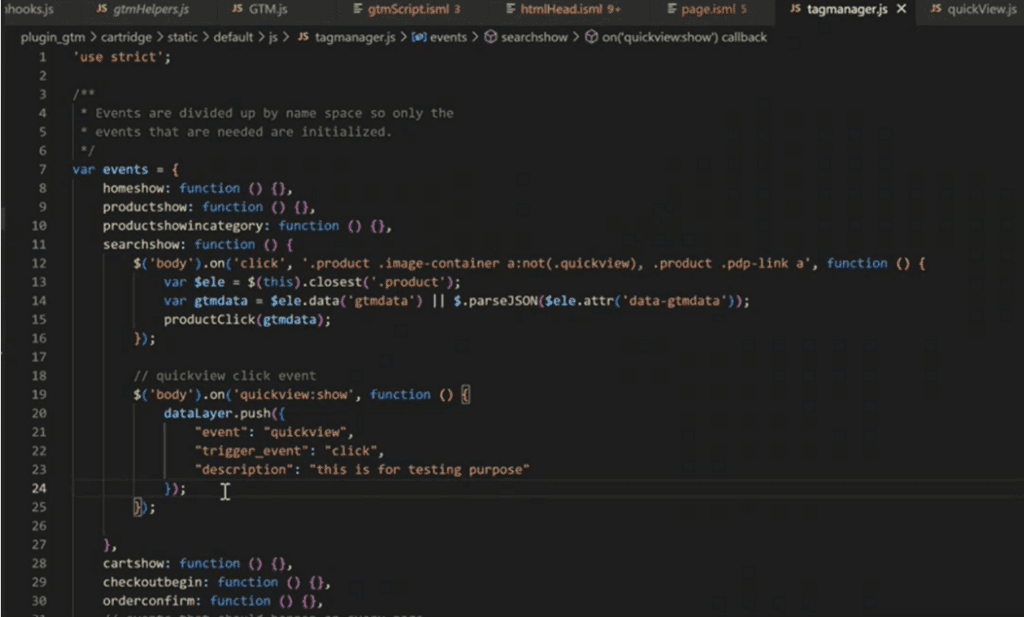
Here, we send Quickview data to GTM using a JSON object under the Quickview click event.
Key inputs:
- searchshow → function for search page modifications
- Quickview: show → trigger for Quickview event
- “event” → event name
- “trigger_event” → type (click)
- “description” → data payload
Dynamic data can be passed using:
- data-gtmdata in ISML
- Access via:
- $selector.attr(‘data-gtmdata’)
- $selector.data(‘gtmdata’)
Note: Data can also be sent using hooks.json.
Step 2: Verify Code Integration
Refresh your storefront → Inspect → Sources → Open tagmanager.js
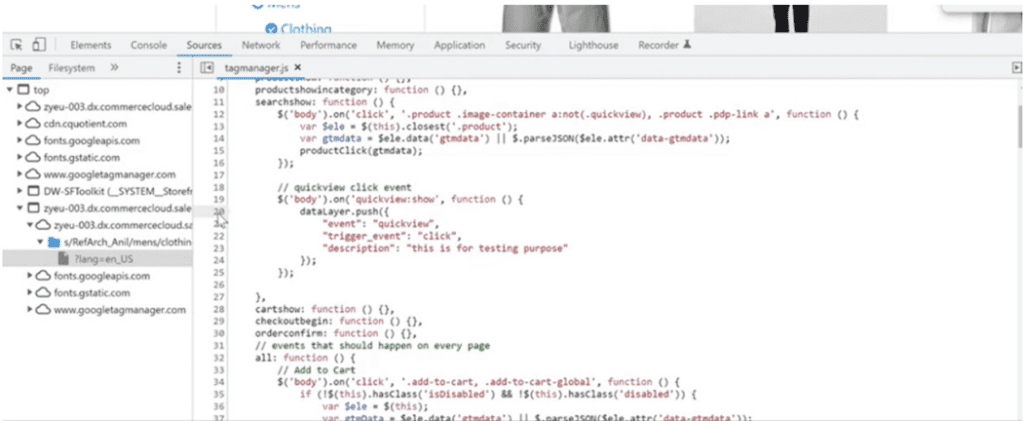
This confirms your codebase is successfully attached to GTM.
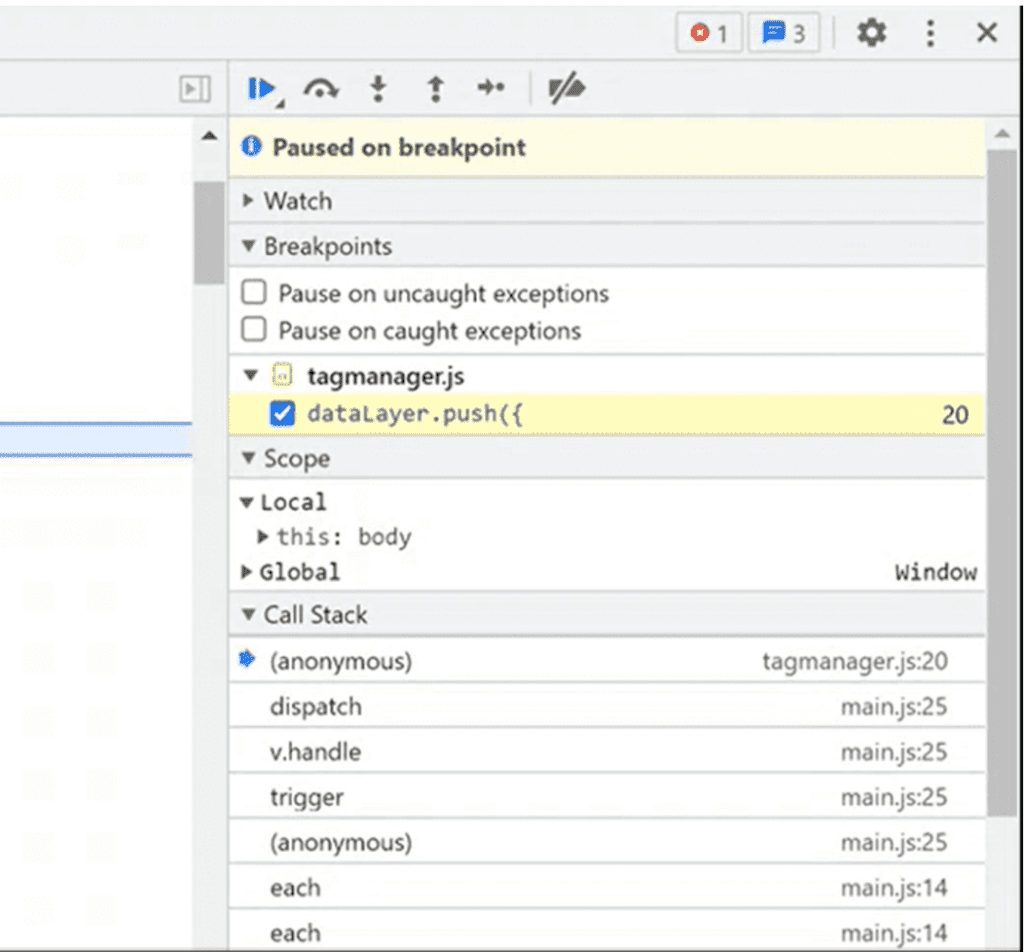
Step 3: Debug Data Layer
Add a breakpoint on dataLayer.push() and click Quickview.
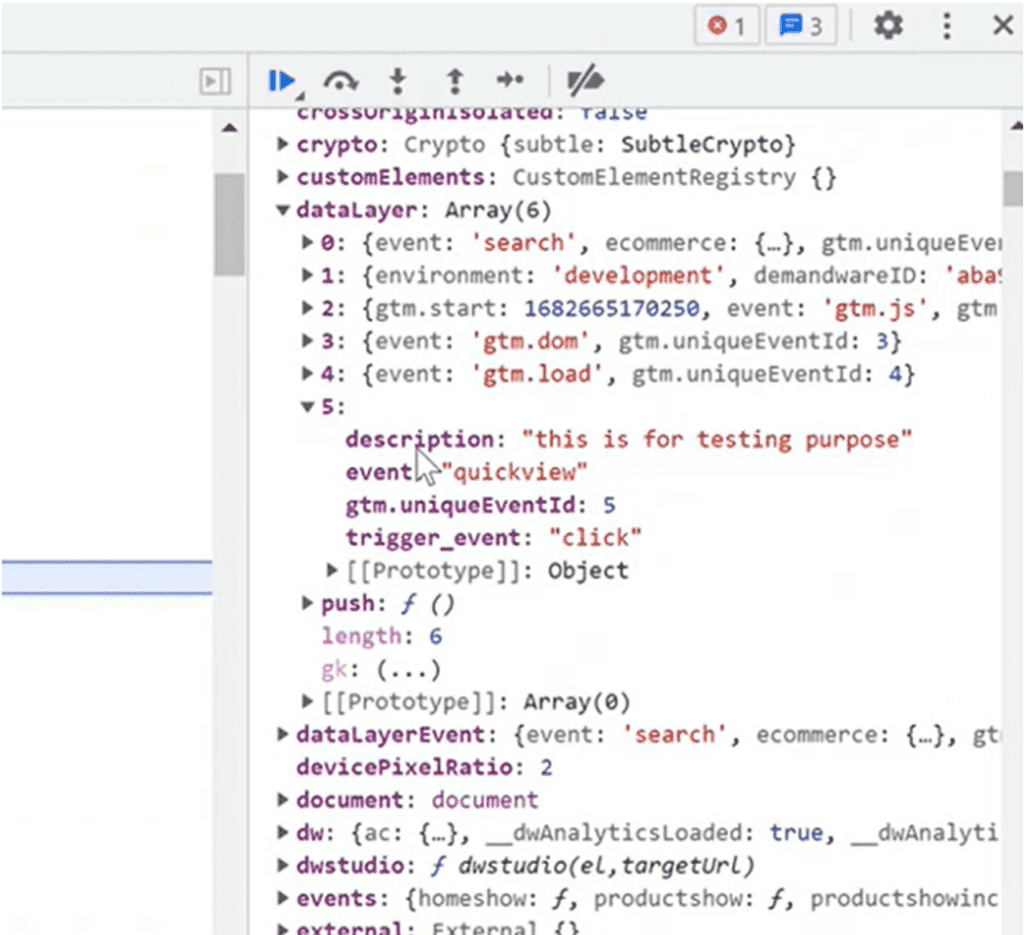
Step 4: Inspect Data Layer
Expand the global object and navigate to the data layer.
Step 5: Validate Event Data
After stepping over, a new index is added with Quickview event data.
Step 6: Verify in Tag Assistant
Check the event in tagassistant.google.com.
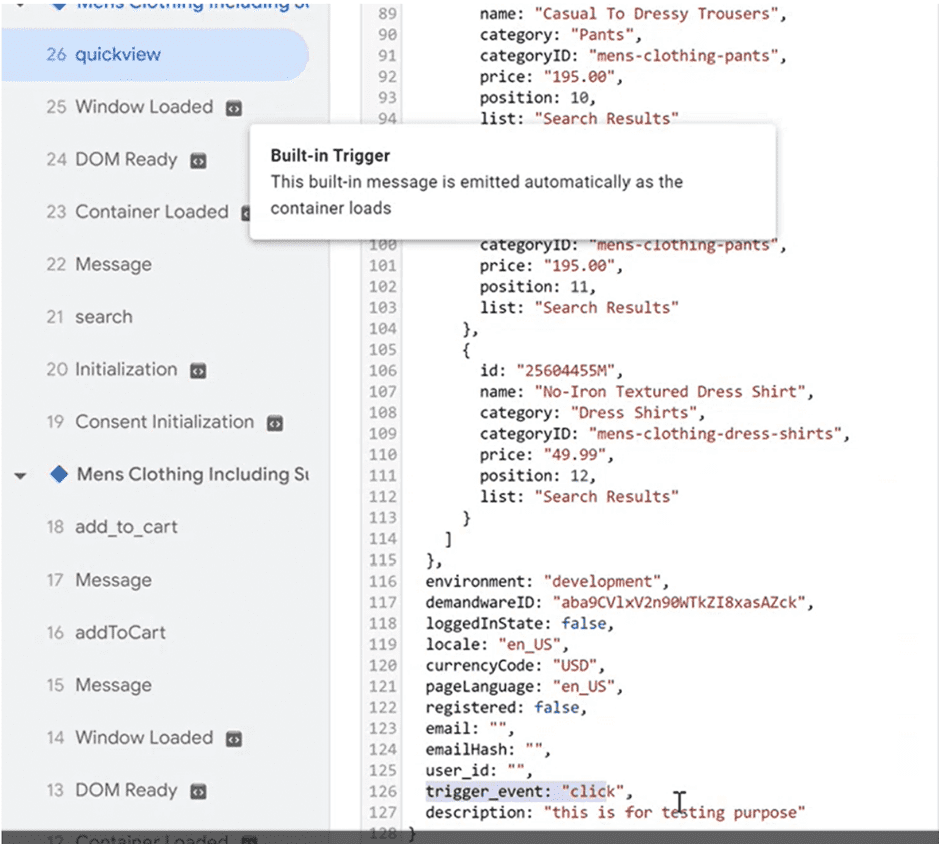
This confirms successful conversion tracking in SFCC and event tracking.
Conclusion
- GTM integration in Salesforce Sandbox and the code base is crucial for capturing and analysing user interactions
- GTM allows marketers and analysts to gain insights into customer behaviour
- Integrating GTM enables marketing teams to manage tags without developer dependency
- GTM integrates with Google Analytics, Facebook Pixel, and Google Ads
- Implementation includes container setup, cartridge integration, and Business Manager configuration
- Testing using Tag Assistant ensures accurate data capture
- Customisations enable advanced SFCC event tracking
- Data layer insights help optimise marketing strategies and user experience